Most developers know they should contribute to open source. Almost none of them do. The ones who do contribute often make the same first mistake: they find a massive repository, get overwhelmed reading the codebase, and give up after an hour.
This guide takes you from zero contributions to your first merged PR using a concrete, repeatable process. It is written for developers who have been coding for at least a few months but have never successfully contributed to a real open source project.
Why Open Source Contributions Matter for Your Career
Let me be direct: one meaningful open source contribution does more for your resume than three tutorial projects.
A merged PR tells a recruiter:
- You can read and understand code you did not write
- You can follow a project's conventions without being told
- You can communicate with maintainers professionally
- You can write a useful commit message and PR description
- Someone else reviewed and approved your code
This is exactly the workflow you will do on day one of any engineering job. A portfolio project shows you can build. An open source contribution shows you can collaborate. Recruiters know the difference.
Beyond the resume value: contributing to open source makes you a significantly better developer. Reading production-grade codebases is the fastest way to level up. You will see patterns you would never encounter in tutorials, understand how real teams structure large projects, and build a mental library of "how good code looks."
Why Most First-Time Contributors Fail
The main reason developers fail to make their first contribution is choosing the wrong project.
They pick the most popular repository they know — React, TensorFlow, Linux — because it feels impressive. These projects have hundreds of maintainers, codebases with millions of lines, and contribution guidelines that take an hour to read. A first-time contributor has no chance of finding a foothold here.
The second reason is aiming too high. They want to fix a real bug or add a feature. This is admirable but sets a bar that is hard to clear without deep codebase knowledge. A first contribution should be smaller than you think is worthwhile.
The third reason is giving up after the first rejection. Open source maintainers are volunteers. Response times vary from hours to months. A PR that gets closed without merging is not failure — it is feedback. Most developers who contribute regularly have had PRs rejected. It is part of the process.
Finding the Right Project
The right first project has these characteristics:
- Active but not massive — 10–200 contributors is ideal. Active enough to have a responsive maintainer, small enough that you can understand a meaningful portion of the codebase.
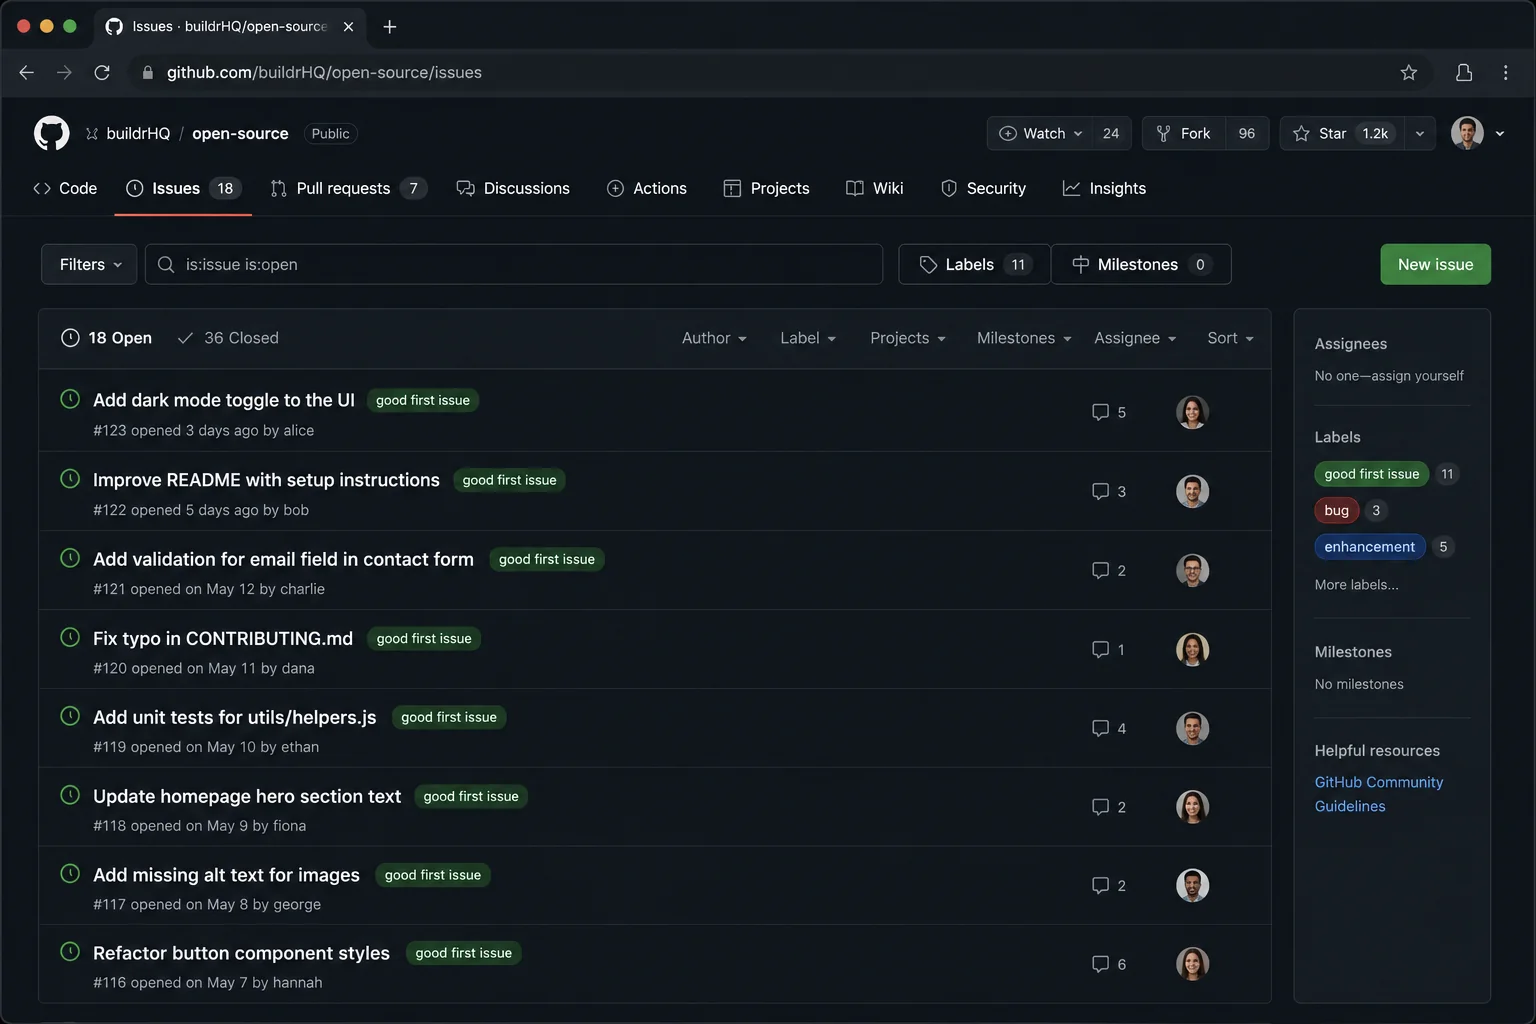
- Has a "good first issue" label — This is the project explicitly signaling: we want new contributors, and these are tasks that do not require deep context.
- Uses technology you know — Your first contribution is hard enough without also learning a new language or framework at the same time.
- Has a clear CONTRIBUTING.md — Projects that have documented their contribution process care about onboarding new contributors.
Where to Find Projects
GitHub Explore: Filter by language and topic. Add good-first-issue to your search: language:typescript good-first-issue.
Good First Issues (goodfirstissues.com): Aggregates good first issues from GitHub daily.
Up For Grabs (up-for-grabs.net): Curated list of projects that explicitly want new contributors.
BuildrHQ Open Source tracker: BuildrHQ's open source module surfaces beginner-friendly issues matched to your tech stack, tracks your contribution activity, and shows you which projects are actively maintained.
Your own dependencies: Look at the packages you use in your own projects. If you ever hit a limitation or found a bug, there is a contribution waiting for you.
The First Contribution: What to Look For
Your first contribution does not have to be a bug fix or a feature. Here is a prioritized list of contribution types from easiest to hardest:
1. Documentation improvements Fix a typo, clarify an explanation, add a missing example to the docs. These are almost always merged without friction, they are genuinely useful to the project, and they teach you the PR workflow without the pressure of code review.
2. Fixing a typo or error in code comments Same as documentation but in the source code. Easy to find, easy to fix, always appreciated.
3. Adding or improving tests Most open source projects have inadequate test coverage. Find a function without a test, write a test that actually covers edge cases, and submit it. This requires reading the codebase carefully — which is exactly what you need to practice.
4. Fixing a small, well-scoped bug A good first bug is one where the issue describes the expected behavior, the actual behavior, and ideally where in the code to look. You reproduce it, fix it, verify the fix, and submit.
5. Implementing a small, well-specified feature Only tackle this if the feature is explicitly listed as a good first issue with clear acceptance criteria. "Add support for X format" is better than "improve user experience."
The Step-by-Step Process
Step 1: Fork and Clone the Repository
Go to the repository on GitHub and click "Fork." This creates your own copy of the repository under your GitHub account. Then clone your fork locally:
git clone https://github.com/YOUR_USERNAME/REPO_NAME.git
cd REPO_NAME
Add the original repository as an upstream remote so you can keep your fork in sync:
git remote add upstream https://github.com/ORIGINAL_OWNER/REPO_NAME.git
Step 2: Read the CONTRIBUTING Guide
Before touching a single file, read CONTRIBUTING.md. This tells you:
- How to set up the development environment
- The branch naming convention they expect
- Whether you need to sign a CLA (Contributor License Agreement)
- How to run tests
- What the PR process looks like
Not reading this is the fastest way to get your PR closed immediately. Maintainers have seen this before and are not sympathetic.
Step 3: Set Up the Development Environment
Follow the setup instructions exactly. If you run into an error that is not in the docs, take notes — that could be your first documentation contribution.
Run the tests before making any changes to confirm everything passes:
npm test
# or
cargo test
# or whatever the project uses
If the tests fail before you have touched anything, leave a comment on the issue you are planning to work on asking about the failing tests.
Step 4: Create a Branch
Never work directly on main or master. Create a branch with a descriptive name:
git checkout -b fix/button-alignment-issue
# or
git checkout -b docs/add-api-key-example
Use the naming convention from the CONTRIBUTING guide if they specify one. If they do not specify, type/short-description is safe.
Step 5: Make Your Change
Make the smallest possible change that fixes the issue or improves the documentation. Do not refactor while you are at it. Do not add unrelated improvements. Scope creep is the single most common reason PRs get rejected or stall.
Read the surrounding code before writing a single line. Match the existing code style. If the project uses tabs, use tabs. If they use interface instead of type, use interface. Reviewers notice inconsistency and it signals carelessness.
Step 6: Write Tests (If Applicable)
If you fixed a bug, add a test that would have caught the bug. If you added a feature, add tests that cover the happy path and at least one edge case. Projects that have existing tests will almost always require you to add tests for new code.
Step 7: Commit Your Changes
Write a commit message that explains what changed and why:
git commit -m "fix: prevent button from submitting when disabled

The submit button was not checking the disabled prop before
calling the onClick handler, allowing form submission even
when the form was in a loading state."
Follow the project's commit message convention. Many projects use Conventional Commits (feat:, fix:, docs:, chore:). If they do not specify, a single sentence in present tense ("Fix button alignment on mobile") is safe.
Step 8: Push and Open the PR
Push your branch to your fork and open a pull request against the original repository:
git push origin fix/button-alignment-issue
GitHub will show a "Compare & pull request" button. Click it.
Write a good PR description:
- Link the issue it fixes: "Fixes #123"
- Explain what changed in 2–3 sentences
- Explain why the change was needed
- Add a screenshot if it is a visual change
- Note anything the reviewer should specifically look at
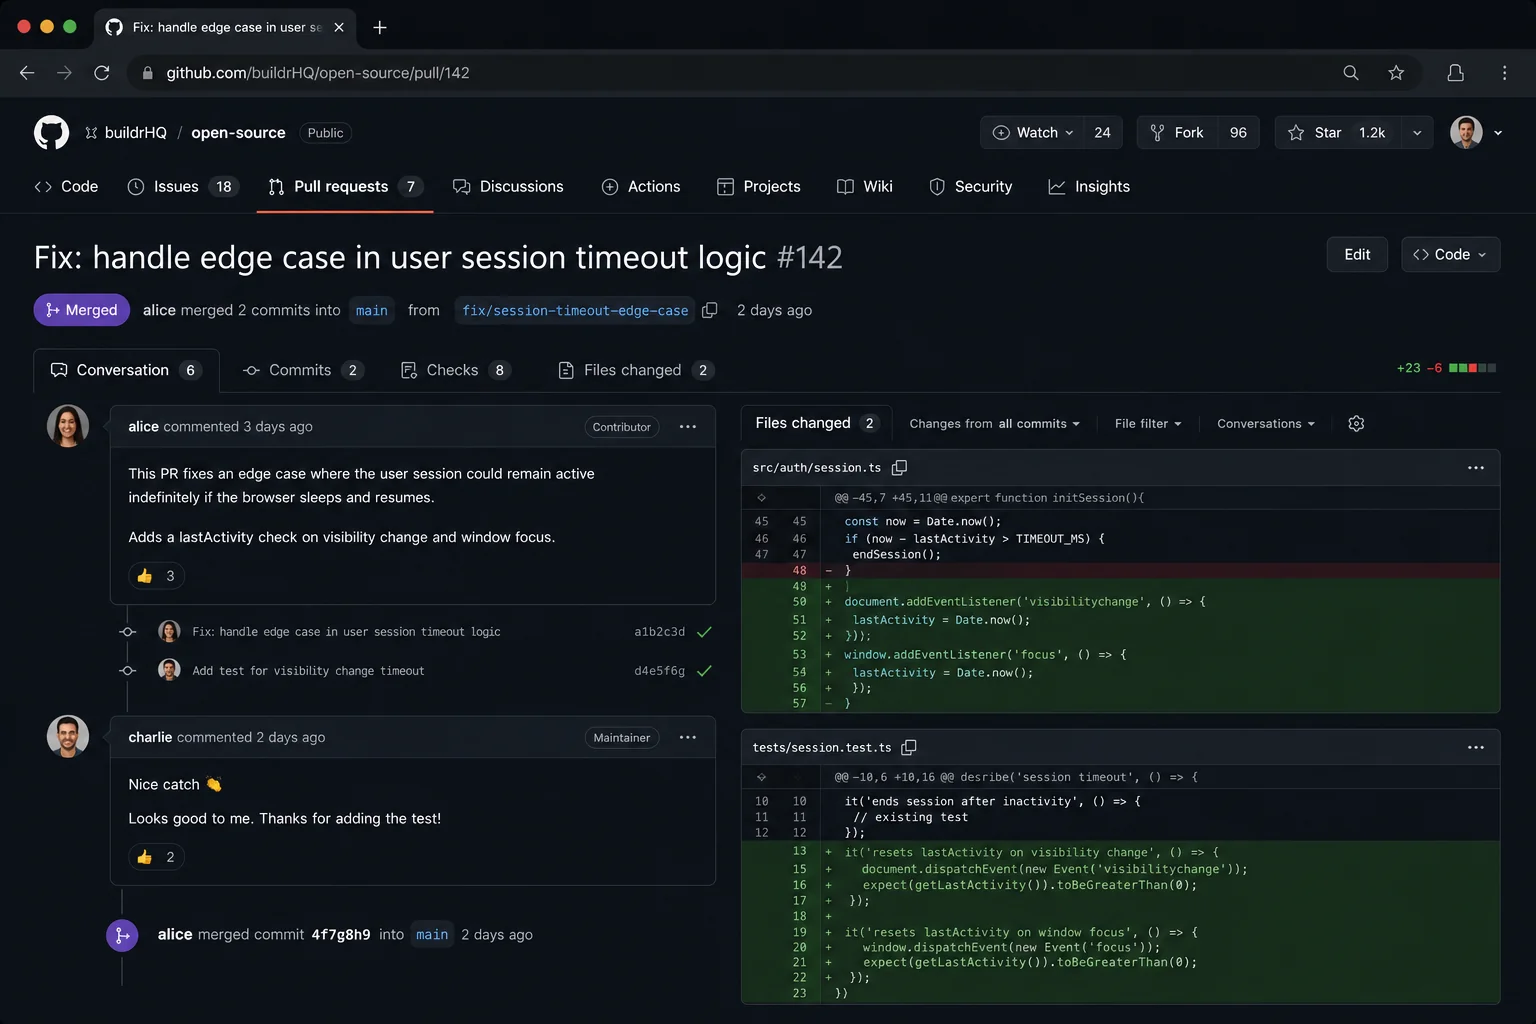
Step 9: Respond to Review
Maintainers review PRs and ask for changes. This is not rejection — it is the collaboration process.
Respond to every comment, even if just to say "Fixed in [commit hash]." Make the requested changes in new commits on the same branch (do not force-push unless the maintainer asks). When all changes are addressed, leave a comment saying "I think all the feedback has been addressed — let me know if there is anything else."
What to Do When Your PR Gets Ignored
This happens. Maintainers are volunteers with their own jobs and lives. If your PR has had no activity for 2 weeks:
- Leave a polite comment: "Friendly ping — happy to make any changes if needed."
- If another 2 weeks pass: post in the project's Discord or forum linking the PR.
- If still no response after a month: move on. Some projects are unmaintained. That is okay. You still practiced the process.
After Your First Merge
When your first PR gets merged, you will feel something disproportionate to the size of the change. A typo fix that gets merged to a project used by thousands of developers genuinely feels meaningful. Sit with that feeling, then immediately look for the next issue.
The goal for month one is three merged PRs, ideally in the same project. Staying in one project after your first contribution is dramatically easier than starting fresh in a new one — you have context, the maintainers know you, and you understand the codebase better.
The goal for month three is at least one non-trivial contribution: a bug fix, a test addition, or a small feature. By this point, your GitHub profile will show genuine open source activity, and your profile will look completely different to recruiters.
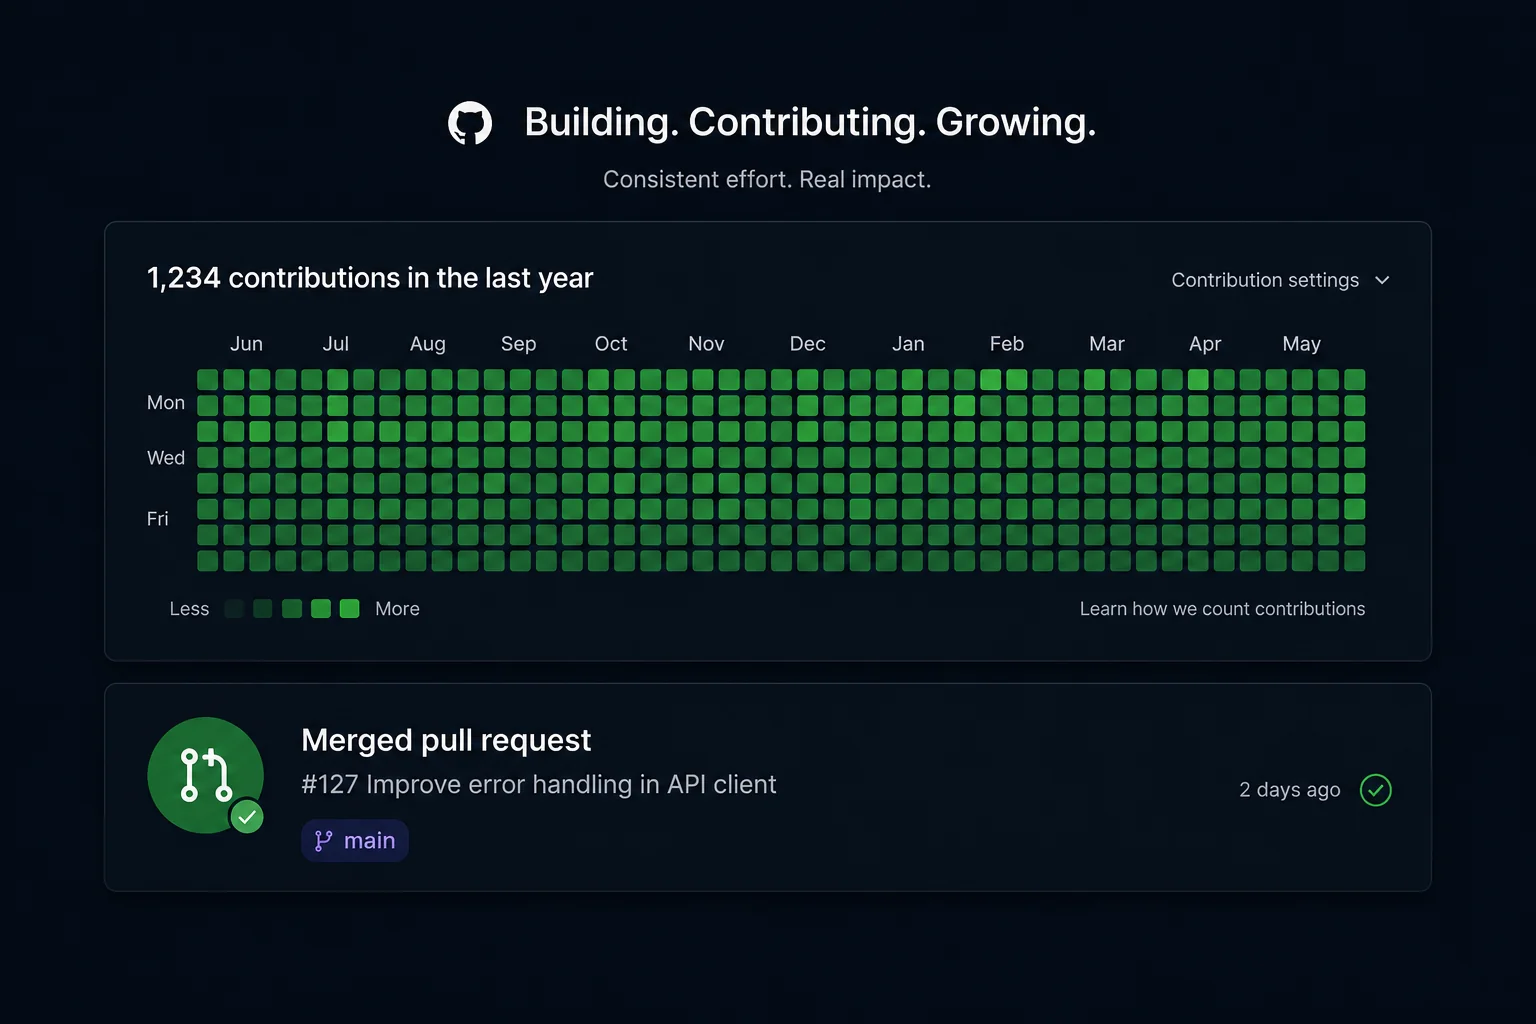
Track your contributions automatically with BuildrHQ's Open Source module, which connects to your GitHub and surfaces your activity, shows contribution streaks, and helps you find your next issue based on your skill level and the tech stack you work with.
The Long Game
The developers with the strongest open source profiles did not get there by contributing to everything. They found 2–3 projects they genuinely cared about and contributed consistently over months or years.
Maintainers notice repeat contributors. Significant contributors get invited to be maintainers themselves. A maintainership at a well-known open source project on your resume is worth more than a second master's degree for most engineering roles.
But that is month 12. For now: find one project, fix one thing, open one PR. The rest follows.